Let us walk you through how to set up a photoshoot from start to finish. Take full advantage of our built in client management tools such as our digital questionnaires, contracts & invoicing features.

Frequently Asked Questions
QUESTIONNAIRES:
Q: How do I receive the questionnaire answers?
A: Once your client completes their questionnaire their answers will be filled out in the questionnaire tab of their photoshoot, plus you’ll receive an email with an attached PDF with all the questions and answers included.
Q: How do I edit the questionnaire templates?
A: Click on ‘My Business’, then ‘Templates’ - here you can edit or add more templates.
Q: How do I know when my questionnaire has been completed?
A: You’ll receive a push notification plus and automated email.
CONTRACTS:
Q: I’m interested in the contracts, how do I find it in the app.
A: To access the contract feature, simply create a photoshoot, click ‘save’ then navigate across in the top slider to ‘contract’.
Q: Is the contract template provided legal?
A: We’ve provided you with a contract template that we’ve paid a fancy contract lawyer to create. This contract covers you for all types of photoshoots, from weddings to maternity, we’ve got you covered. It includes a model release so you have full copyright of the images and can use the images for your website, marketing, social media etc. The contract also includes a social media license that outlines how your clients can use the images on their own social media, for example not add filters or re-edit your photos.
Q: Can I use my own contract?
A: You're welcome to edit our template and enter your own contract text. Simply click the contract text, edit or delete as you please. This will update the contract text on only this one photoshoot. To save as a template for future photoshoots so you don’t need to edit it each time, you’ll need to update and save your new contract in “Templates” or simply add more.
Q: How do I edit the contract template?
A: Click on “My Business” then navigate to “Templates”. Here you will find the contract template. If you wish to add another contract template simply click ‘Add a new template’.
Q: How does my client sign the contract?
A: Once you have saved your contract, navigate back to the client details screen, scroll to the bottom and select the items you would like to share with your client. This will generate a unique web link that your client can click on and open online. They can fill in their questionnaire answers, sign your contract and view the invoice all from this link. Once they’ve signed your contract their signature will be saved in your app under their photoshoot and you’ll receive the signed contract via email. This link will always be live so you can access it at any time in the future, so you don’t need to stress about saving and filing contracts away.
Q: Is there a way to add two clients to the contract so they both can sign it?
A: Yes, simply add 2 contacts to your “Details” tab and click save.
Q: How do I print my contracts?
A: You’ll receive the signed contract PDF via email once signed so you can save and print, or access anytime via the client web link, and click ‘download contract’.
Q: Can I add more than one contract template to the app? As I use a different contract for weddings and branding sessions?
A: Yes, you can save as many contract templates as you like.
INVOICES:
Q: How do I add payment details to my invoice?
A: Navigate to ‘My Business’ and click on ‘Invoicing’ > ‘Add Payment Method’. Here you can add all your business information, including payment methods.
Q: How can I accept client credit cards via stripe?
A: You can accept client credit cards via stripe. In your profile you’ll find a button “link with stripe” click this to get started. Once you’ve setup your stripe account it may take unto a week to get your first payout as they authenticate your bank account, after that you’ll be paid out every 24 hours. Stripe fees vary from country to country but they start at 1.75% + A$0.30 for domestic cards.
Q: What other payment methods can I offer?
A: You can add whatever other payment methods you like. For example bank transfer, paypal, venmo etc. Square integration is coming soon.
Q: How do clients pay the invoice?
A: Simply generate your client link and share it with your client. On the web link they’ll see a pay button. When they click on this button they’ll see your various payment methods once they select their payment method they’ll be able to pay your invoice.
Q: Is there a fee for transactions?
Unscripted doesn’t charge any additional fees for using our invoice services. You will still have the normal transaction fees for using third parties like paypal, square, venmo, stripe etc. Stripe fees vary from country to country but they start at 1.75% + A$0.30 for domestic cards.
Q: Is there a way to put an actual dollar amount in for the retainer? Mine only lets me put a percentage?
A: Yes simply change the toggle at the top from % over to $
Q: How do I change the terms on my invoice? I want to change the amount of time for a client to pay their retainer and full amount?
A: Click into “My Templates” here you can pre-set a template that will populate the terms on each shoot. Or make edits to individual shoots by clicking on the “edit terms” section on that particular shoot. This will save the changes to just this one photoshoot.
Q: Can I set up a payment plan for my clients?
A: At the moment we only offer 2 payments, retainer and final balance. We will be adding more options very soon.
Q: Can I add extra products and services to my invoices?
A: Yes, simply add the product or service to your clients invoice and your client will have the option to pay the remaining balance when they hit ‘Pay’ on their invoice.
SHARING LINKS AND MESSAGES WITH YOUR CLIENT:
Q: When I click ‘share via email’ I get an error notification
A: This error will appear if you don’t use the apple mail app on your device. You can add apple mail to your device or share via Gmail by simply clicking the ‘more’ button

Q: How to share the client link with your business email not personal
A: When you wish to share a questionnaire, invoice, contract or pre- saved message via the app you’ll see 4 options. Share via text, share via unscripted email, share via apple mail and share via other (Gmail, Outlook or Yahoo).
If you don’t use apple mail and wish to share via Gmail, click “More” and navigate to the Gmail app in the pop up window that opens.

Whatever email platform you choose to send with needs to have your business email already setup in your Apple Mail or Gmail account settings which will then populate in the “from” section.

If you haven’t added your business email to your email platform on your phone, then it won’t appear as an option in the from section when you click share via email.
- Here is the how to link for apple mail: https://support.apple.com/en-au/HT201320
- Here is the how to link for gmail: https://support.google.com/mail/answer/6078445?co=GENIE.Platform%3DiOS&hl=en
HOW TO CREATE A TIMELINE:
Q: How to create a wedding timeline
A: Add in all the important parts of the day that you want to keep track of. If you’d like to receive a push notification which will buzz quietly in your pocket if you set your phone to silent, turn on the toggle for each event.
SEND, EDIT & AUTOMATE E-MAIL TEMPLATES

Q: How to edit and send an email template
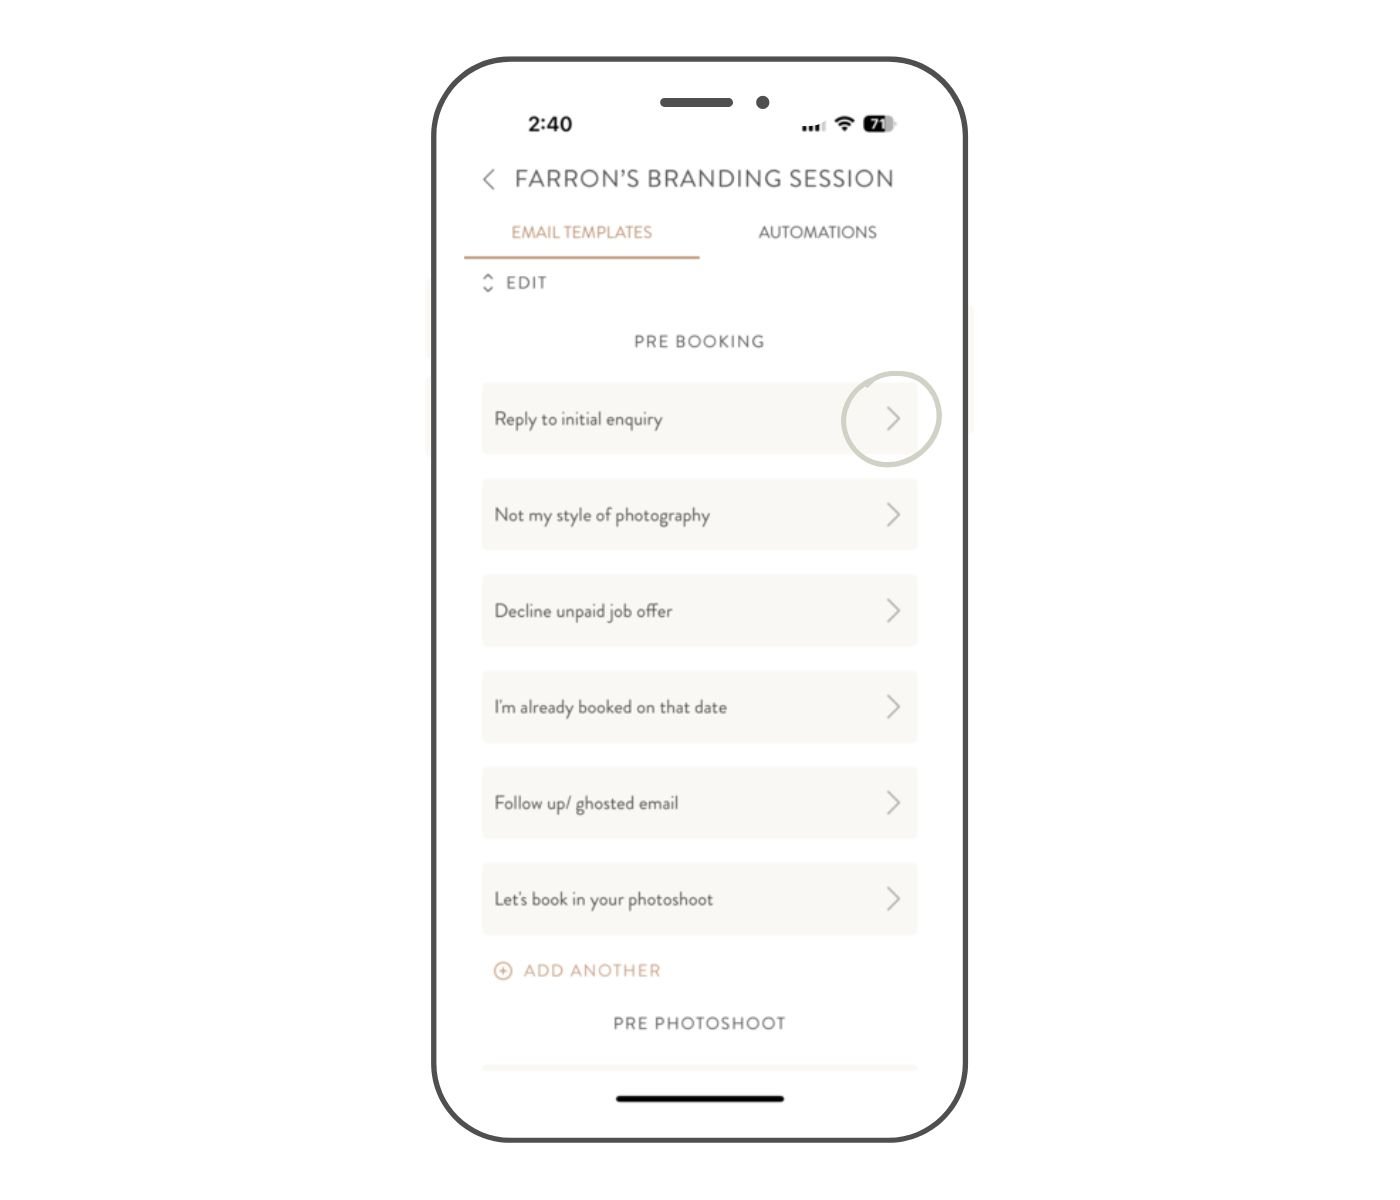
A: Simply type over our templates to make them yours. Then click share at the bottom of the message to share with your client. This feature is perfect if you receive an email while out and about, now you can one click to reply and get on with your day.
A: Click “edit” to change the order of pre-saved messages or delete them.
A: Click the calendar icon to set an automated trigger for the emails.


